Bathtub Refinishing with Armoglaze DIY Refinishing Kit
Fed up with your stained, chipped, or unattractive bathtub? Instead of wasting a lot of money on a disruptive replacement, the Armoglaze Bathtub Refinishing Kit offers an easy, professional-quality alternative.
Unlike other bathtub paint kits that are smelly and hard-to-apply sprays, Armoglaze is a 100% odorless, Zero-VOC, pour-on epoxy enamel. Its advanced, self-leveling formula is designed for DIY homeowners. Creating a thick, durable, high-gloss finish that looks and feels like a brand-new tub.
Why Choose Armoglaze for Your Bathtub Reglazing?
Armoglaze stands out as the top DIY bathtub refinishing kit because it was designed to address the biggest issues of traditional kits: toxic fumes, complicated spray applications, and fragile finishes that peel.
✅ Easy Pour-On, Self-Leveling Application
Forget streaks, brush marks, or messy overspray. Armoglaze uses a simple pour-and-spread method. You pour the enamel, and it self-levels to a seamless, high-gloss finish. We even include the professional spreaders to make it foolproof.
✅ No Harsh Acid Etching or Primer Needed
Our advanced formula has been improved to simplify prep. You no longer need to use a separate, hazardous acid-etching product. Our unique process uses a standard bathroom cleaner and sandpaper to prep the surface for a powerful, permanent bond safely.
✅ 100% Odorless & Zero-VOC Formula
This is our most significant advantage. Armoglaze is a fume-free, non-toxic refinishing solution. It's safe to use in any bathroom, even those with poor ventilation. It's ideal for homes with children, pets, and anyone sensitive to harsh chemical smells.
✅ Superior Durability on All Tub Surfaces
Our high-quality epoxy enamel creates a thick, durable coating that chemically bonds to your tub, resisting peeling, chipping, and discoloration. It’s a permanent solution for all common tub materials, including:
- Porcelain
- Cast Iron & Steel
- Acrylic & Plastic
- Fiberglass
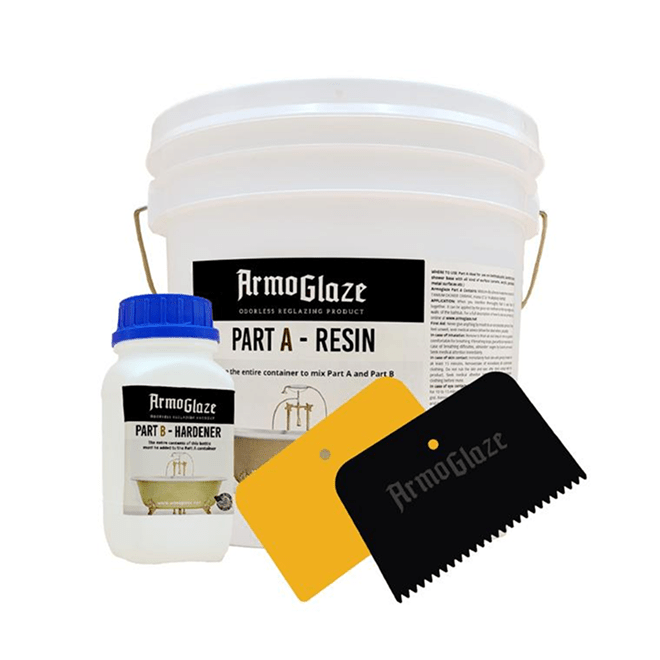
What’s Included in the Armoglaze Refinishing Kit?
Our all-in-one kit is comprehensive, giving you everything you need for your project.
- Part A: Armoglaze Epoxy Paint
- Part B: Armoglaze Hardener
- Paint Mixing Stick
- Plastic Spreader: For spreading enamel on tub walls
- Black Spreader (with teeth): For smoothing the bottom of the tub
- Detailed Instructions
How to Use the Armoglaze Kit: A Step-by-Step Guide
Refinishing your tub is an easy DIY project. For best results, follow the preparation steps carefully—this is the most essential part of the process.
IMPORTANT: The room and tub temperature must be between 68-77°F (20-25°C). Once mixed, you will have 2 hours of working time.
Step 1: Prep & Clean the Surface
First, remove any old, peeling paint from a previous refinish. Use a razor scraper to remove all old silicone or caulk from around the tub. Thoroughly clean the tub with an abrasive cleaner (like Comet) to remove all soap scum and grime.
Step 2: Repair Any Chips or Cracks
For a flawless finish, all damage must be filled. (This is the most important part!) Do not use generic "car body filler," as it might not be compatible. Use the Armoglaze Repair Kit to fill chips, cracks, or deep scratches professionally. Once cured, sand the repair smooth.
Step 3: Etch & Sand (The Easy, Safe Way)
Apply a bathroom cleaner, such as Scrubbing Bubbles, to the tub. While the tub is wet, sand the entire surface with #80-100 grit sandpaper (or #180-220 grit for plastic or acrylic tubs). This creates a microscopic, rough surface for the epoxy to bond to permanently.
Step 4: Dry, Degrease & Mask
Rinse the tub until it's completely clean. Dry the tub thoroughly with a hair dryer, paying close attention to the corners. Ensure no water or wet spots is remaining. Wipe the entire dry tub with a degreaser, such as 91% rubbing alcohol or acetone. Finally, mask off your drain, overflow, and surrounding walls.
Step 5: Mix, Pour & Spread
Pour all of Part B into Part A. Mix slowly and thoroughly with the mixing stick for at least 10 minutes. Pour the mixed enamel onto the top edges and walls of the tub first. Use the included plastic spreader to guide the enamel down the walls.
Step 6: Finish the Bottom & Cure
Pour the remaining enamel on the bottom of the tub. Use the black spreader, holding it lightly, to create a smooth, even finish (about 1/16 inch thick). Remove your masking tape exactly 2 hours after you first mixed the enamel. Let the tub cure for 24 hours before use.

Maintenance and Longevity
Your new Armoglaze finish can last for years. To clean, use only mild, non-abrasive cleaners (like dish soap or Scrubbing Bubbles). Avoid harsh chemicals, drain cleaners, or abrasive scouring pads.
Frequently Asked Questions (FAQ)
How long does the refinishing process take? The entire process takes 3-4 hours (primarily for prep) plus a 24-hour cure time. You have a 2-hour window to apply the enamel once it's mixed.
Does the Armoglaze kit smell? No. Our kit is 100% odorless and Zero-VOC, making it the safest choice for indoor DIY use.
Is this kit really for beginners? Yes! Because it's a pour-on, self-leveling product, you don't have to be an expert with a spray gun. You pour and spread. The simplified prep (no acid etching) also makes it much easier and safer for a first-time user.
What surfaces can I use this on? Armoglaze is a porcelain bathtub refinishing kit that also works perfectly on fiberglass tub repair, acrylic, and enameled steel or cast iron.
Conclusion: Get a New Tub for a Fraction of the Price
Don't settle for a stained, outdated bathtub. The Armoglaze Bathtub Reglazing Kit is the safest, easiest, and most durable solution for any homeowner. Get the professional-grade, high-gloss finish you want without the cost, mess, or fumes.
Ready to transform your bathroom? Order your Armoglaze kit today.