


How to Fix a Chipped Bathtub: Chips, Cracks and Holes

A chipped bathtub is one of the most common bathroom problems, and it rarely stays cosmetic for long: once the finish is broken, water seeps underneath and the damage spreads. Replacing the tub requires demolition, plumbing, and days without a bathroom. In most cases, the chip can be filled instead, in an afternoon, for a fraction of the cost.
You'll learn which damage you can fix yourself, how to identify your tub material, and how to repair the chip step by step.
What Causes a Chipped Bathtub
Chips almost always result from impact: a dropped shampoo bottle, a shower head knocked off its holder, or a tool during a renovation. On porcelain and cast iron, the enamel is hard but brittle, so it breaks away cleanly, exposing the metal underneath — which is why rust often starts at the edge of a chip within weeks.
On acrylic and fiberglass, the surface flexes rather than chipping, so damage appears as a star crack or a hole rather than a clean chip. A tub floor that flexes underfoot makes the problem worse over time.
Either way, the chip itself isn't the real problem. The exposed layer underneath is.
What Damage You Can Repair Yourself
A repair kit fills and bonds damage to the surface. It is the right tool for:
- Chips where the finish has broken away
- Hairline and star cracks in acrylic or fiberglass
- Holes drilled or punched through the surface
- Deep scratches and gouges
- Chipped enamel on porcelain and cast iron
It is not the right tool for:
- A floor that flexes or feels soft underfoot. That is a support problem beneath the tub, not a surface problem
- Rust that has eaten through a steel tub from behind
- A tub that has shifted, separated from the wall, or leaks at the drain
If your damage is in the second list, a repair kit will not hold. Those cases need a contractor.
Identify Your Tub Material First
The material affects how you sand, how carefully you fill, and what to expect from the finished repair. Most tubs and shower bases are one of three materials, and you can tell them apart in under a minute.
Acrylic
Press firmly on the wall of the tub. Acrylic gives slightly and feels warm to the touch. The color runs all the way through the material, so a deep scratch shows the same color, not a different layer underneath. Acrylic is the most flexible of the three, which is why it tends to crack around stress points rather than chip.
Fiberglass
Fiberglass also flexes and feels warm, but it is thinner and lighter than acrylic. The tell is the damage itself: chip the surface and you will see a dull, fibrous layer beneath the glossy gelcoat. Fiberglass usually sounds hollow when tapped.
Porcelain and Cast Iron
These feel cold and completely rigid, with no give at all. Tap the side and you get a dull, solid sound rather than a hollow one. Cast iron tubs are extremely heavy. The enamel chips away cleanly and you see dark grey metal underneath, often with rust starting at the edge of the chip.
How to Fix a Chipped Bathtub: Step by Step
Step 1: Clean and Prepare the Area
Clean the damaged area and the surface around it thoroughly. Remove soap scum, grease and loose material from the edges of the chip or crack. Any old, flaking coating around the damage must come off, or the repair will bond to the flaking material instead of the tub. Lightly sand the damaged spot and a small margin around it so the compound has a rough surface to grip. Wipe with rubbing alcohol and dry completely.
Step 2: Mix and Apply the Repair Compound
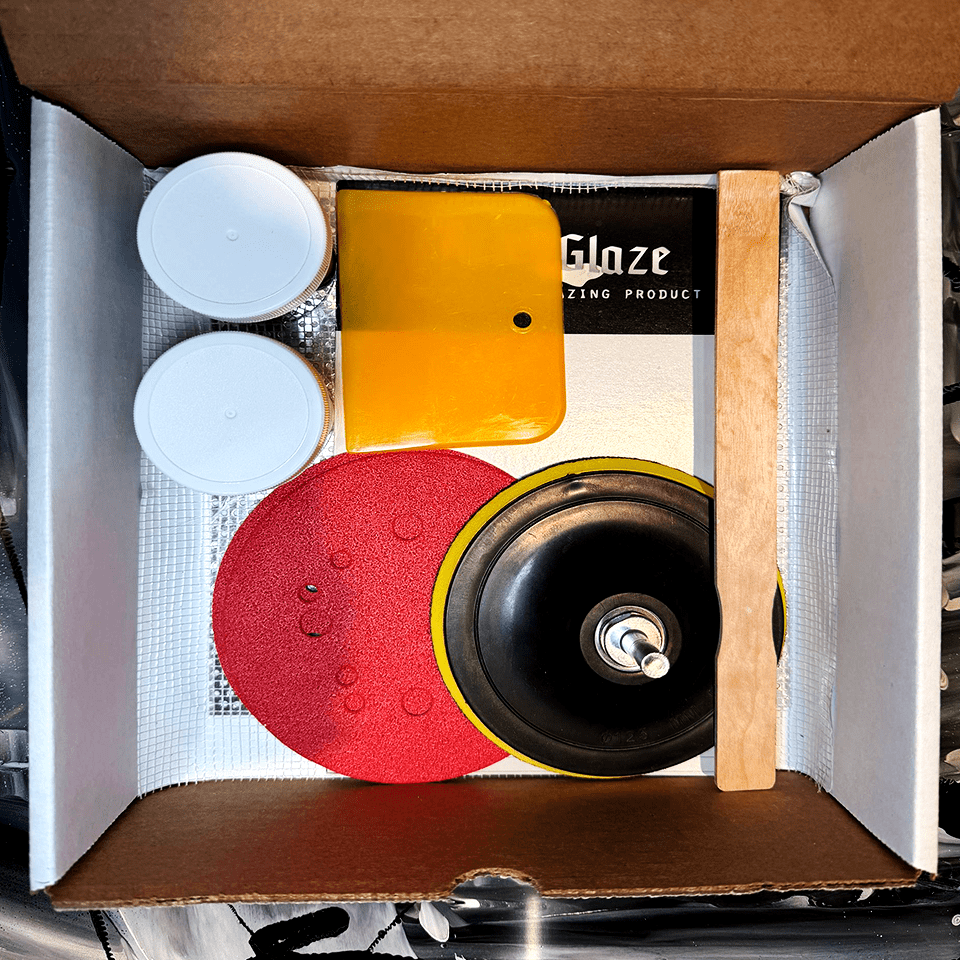
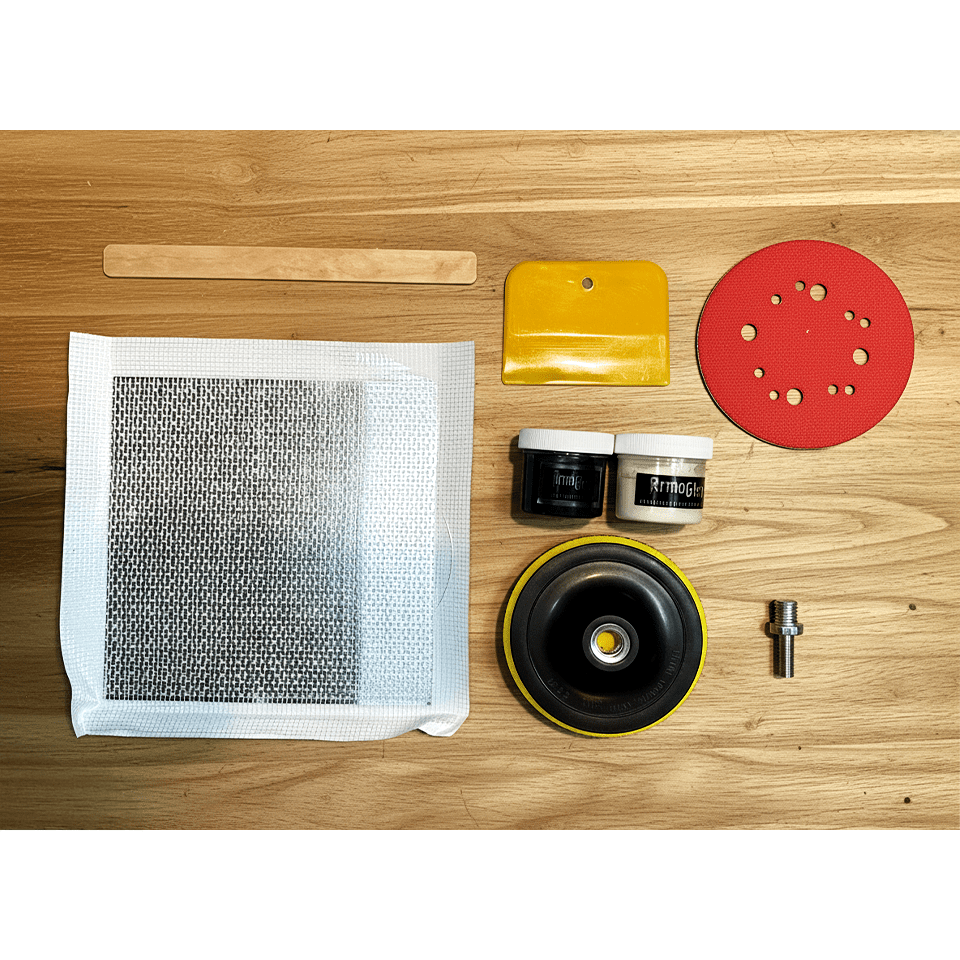
Read the instructions in your Armoglaze Repair Kit before you mix anything. Mix the two components in the ratio given on the packaging. This is the step where most repairs go wrong, and once mixed you are working against the clock. Use the supplied spatula to press the compound into the chip, crack or hole, working it in rather than laying it on top. Smooth it level with the surrounding surface. Slightly proud is better than slightly low, since you will sand it down afterward.
Step 3: Let the Repair Cure
Allow the repair to cure for the full time listed on the kit. Curing is a chemical reaction, not drying, and cutting it short leaves the repair soft underneath a hard skin. Keep the tub dry and out of use for the entire period.
Step 4: Sand the Repair Flush
Once fully cured, sand the repaired area until it sits perfectly flush with the surrounding surface. Work from a coarser grit to a finer one and check by running your hand across it with your eyes closed. You will feel a ridge you cannot see. Wipe away all dust when you are done.
Do You Need to Refinish After the Repair?
Once cured and sanded, the repair is watertight and will hold. But it will still be visible. A filled chip rarely matches the surrounding gloss and color exactly, especially on an older tub where the original finish has dulled unevenly.
If appearance matters as much as function, the next step is a refinishing coat over the whole surface. A self-leveling epoxy covers the repair and the old finish together, so you get one seamless surface instead of a visible patch. Use the Bathtub Refinishing Kit for tubs or the Shower Base Refinishing Kit for shower pans, and follow our guide on how to refinish a bathtub.
If the damage is small, in a low-visibility spot, or you simply need the tub watertight again, the repair alone is enough.
DIY or Hire a Pro?
When DIY Works
Minor to moderate chips, cracks and holes in the surface are well within reach if you can follow instructions carefully and wait out the cure time. This is the majority of tub damage, and doing it yourself typically saves several hundred dollars.
When to Call a Contractor
Call a professional when the problem is behind the surface rather than in it: a flexing or soft floor, rust through the shell, movement at the wall joint, or an active leak. A surface repair on a structural problem will fail, and you will end up paying for the work twice. You can book a certified refinisher if you'd rather not do it yourself.
Chipped Bathtub FAQ
Can you fix a chipped bathtub yourself?
Yes, if the chip is in the surface and the tub is structurally sound. Clean, sand, fill, cure and sand flush — most repairs take an afternoon plus cure time.
What happens if you leave a chip in a bathtub?
Water gets under the finish. On steel and cast iron it turns into rust that spreads beneath the enamel; on fiberglass the crack grows every time the floor flexes.
Can you use car body filler on a bathtub?
No. It isn't made for constant moisture and hot water, and it doesn't bond the same way. Use a two-part filler made for tubs.
Will the repair be visible?
Usually slightly, because filler rarely matches an aged finish exactly. Refinishing the whole tub over the repair hides it completely.
Can you repair a cracked fiberglass or acrylic tub?
Yes, if the crack is in the surface and the floor underneath doesn't flex. If the tub moves when you stand in it, fix the support first or the crack will return.
How long before I can use the tub?
Only after the full cure time listed on the kit. Using it earlier can leave the repair soft and cause it to fail.
Does the repair kit smell?
The Armoglaze Repair Kit is odorless and Zero-VOC, so you can work indoors without strong fumes.
Can I fix rust on a cast iron tub?
Surface rust at the edge of a chip can be sanded out and filled. Rust that has eaten through the tub from behind cannot be repaired from the surface.
Get Your Tub Back to Like-New
Fixing a chipped bathtub is a straightforward afternoon project. The Armoglaze Repair Kit includes everything needed to fill the damage and restore the surface: odorless, made in the USA, and backed by support if you get stuck partway through.
Leave a comment